Using the Closing Date to Protect Your Data
- 25
- Feb
 The Closing Date is a setting in QuickBooks that most companies will need to be setting soon. This is set after the books have been sent to the CPA and any adjustments have been made if necessary. This setting should be password protected and shows that the books have been closed for the prior year. This can only be done by the QuickBooks company administrator.
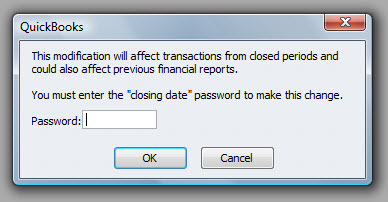
It is used to prevent accidental changes to prior year data. If changes are attempted, you are met with a warning box to accept, and password request such as below.
 This simple setting can prevent searching for problems down the road. Sometimes others working in the file may not realize the impact of their change or you may even key a date incorrectly without realizing it. The important factor to realize here is that you can make changes if necessary by overriding with the password. You just need to be certain or verify with your bookkeeper or accountant before affecting prior year.
How to set the Closing Date:
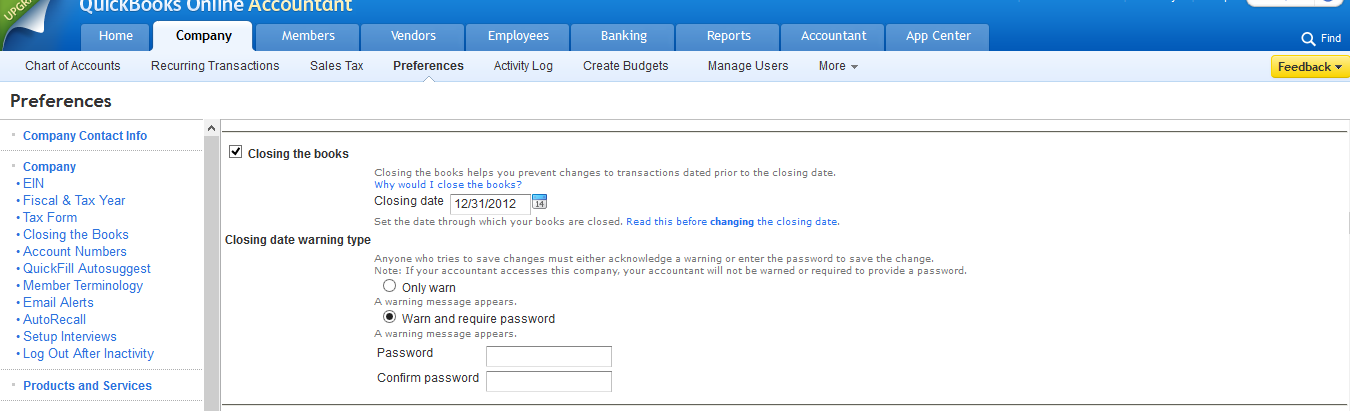
QuickBooks Online Classic: Go to the Company tab, Preferences, choose Company on the left, closing the Books, check Closing the Books on the right, enter the Closing date (eg 12/31/13), check warn and password, enter the password, click save.

QuickBooks Online Harmony: Go to the Cog in the top right of the screen, choose Settings, Company Settings, on the left menu that is inset choose company, Closing the Books, check Closing the Books on the right and enter the Closing Date (eg. 12/31/13), check warn and password, enter the password, click save.

QuickBooks Desktop: Go to Company in the top row, select Closing Date, on the right bottom enter the date and enter the password, hit OK.
If you haven’t received your changes back from your accountant yet, subscribe to my blog at the bottom of the home page to easily find this post again when you are ready to set the closing date in a few weeks.